Don't throw shirts with stains! This ingenious trick will remove the most disgusting stains from your clothes
|


We've all been there before. You drop a piece of food on your favorite shirt and the result is an oily and disgusting stain that actually destroys the shirt completely.
This fat is almost impossible to remove. You can try many things, and sometimes you'll be able to remove perhaps 80% of the stain, but it will never be good enough. You get angry and throw your shirt to the trash, even though it's your favorite.
But here's an old trick that most of you probably didn't know, and maybe some of you have already forgotten about. It's great for stain removal and you'll never have to worry about throwing your favorite shirt in the trash again!
Here's what you need:
- Liquid dish soap
- WD-40
- Baking soda powder
- an old toothbrush
- a piece of cardboard
- and ear cleaning sticks

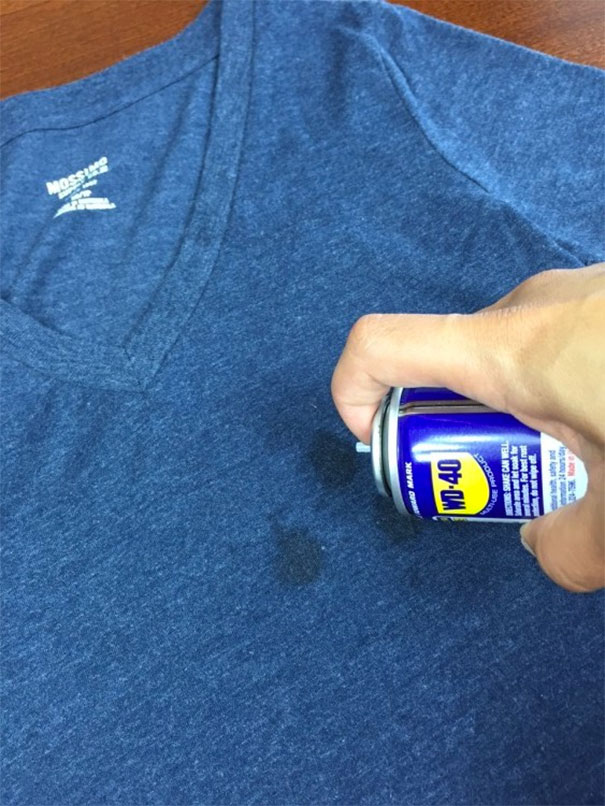
So let's start. See the disgusting stain? Yes, it's definitely disgusting.
Start by placing the cardboard behind the stain, and spray over it with the WD-40. The cardboard is to prevent the WD-40 from spreading to other parts of the shirt. You can use the ear sticks to apply the WD-40 to the stain. What the WD-40 does is it "Re-activates" the oil.
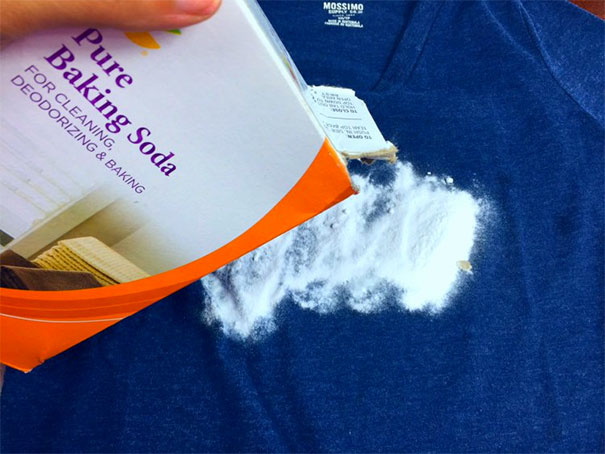
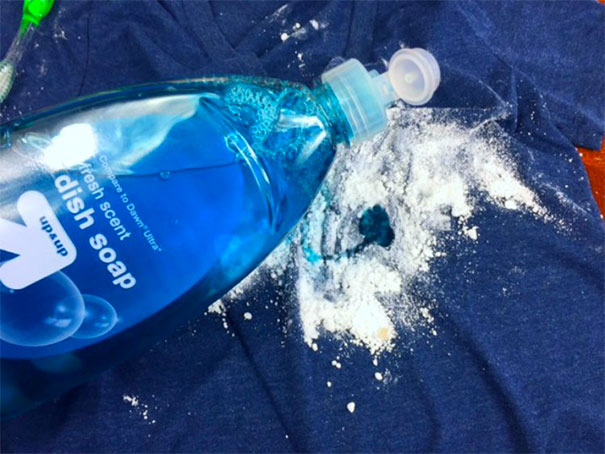
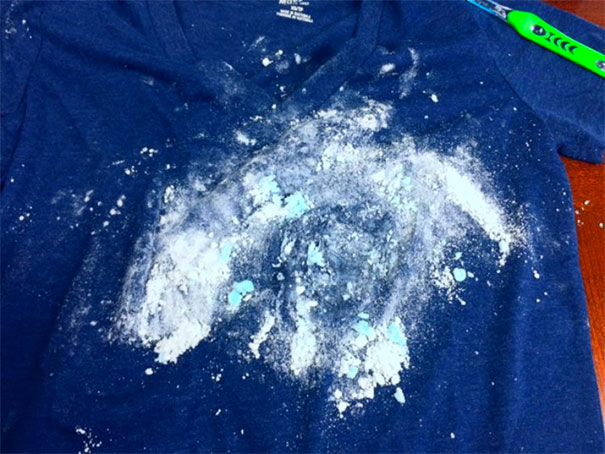
Now take the baking soda powder, and sprinkle it all over the stain. Yes, put a generous amount. This will absorb the oil.
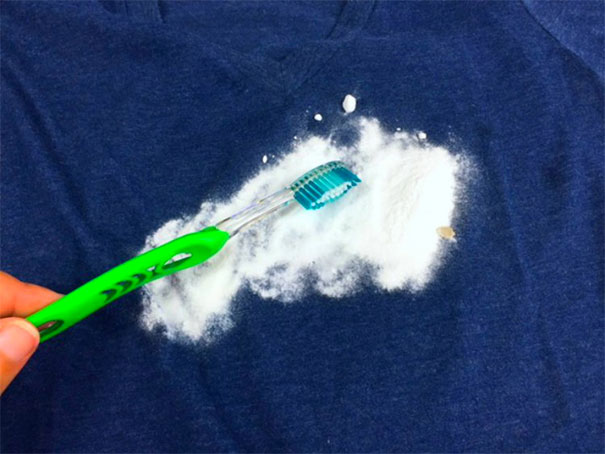
Then, use the old toothbrush to apply and insert the baking soda powder into the stain. The baking soda powder will become lumpy
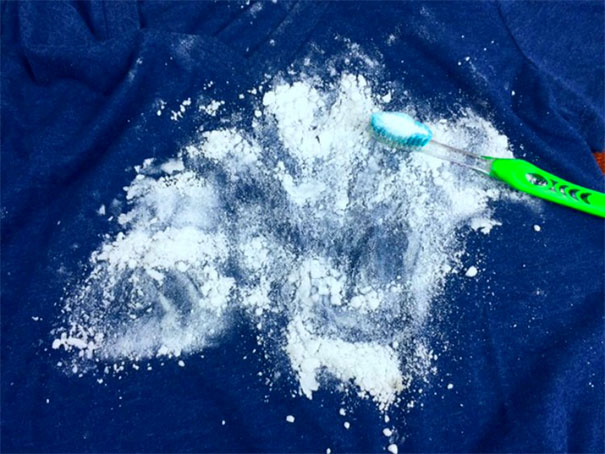
Sprinkle the dishwashing liquid on the baking soda, and rub it also with the toothbrush. Maybe you should prepare a little rag to wipe the lumps on the toothbrush.
Now, remove the cardboard and put the shirt into the laundry machine and turn on the machine (you can add more clothes to the machine if you like). But do not put your shirt to the dryer! (If part of the stain remains, the dryer will actually bake the stain into the shirt).
And if you've followed the instructions, then viola! The stain is gone! And if you'll still see it, simply repeat the process until it is gone completely.


